Tag Archives: make your own

Baby bum cream to prevent nappy rash

9 Oct

babby-balm

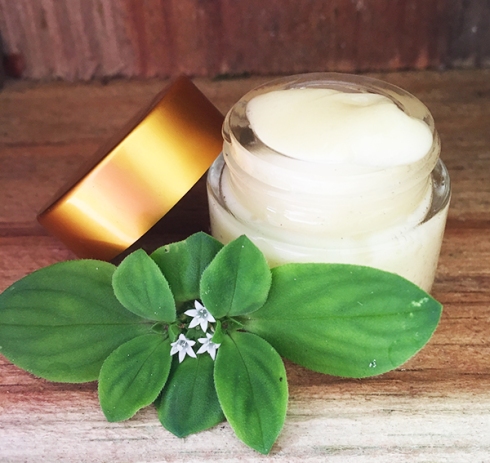
This baby bum cream is fantastic, it can be used with cloth nappies or disposables & can be used as a soothing all over balm for your baby’s skin. It works wonders on that dry skin babies often get behind their ears & can even be used to gently lift cradle cap.

With the addition of lavender essential oil its great to use as an all-over massage balm, perfect for naturally soothing your little one off to sleep after bath time.

This Baby bum cream is full of a host of goodies that will protect & soothe your babies skin, like coconut oil which is anti-bacterial & anti-fungal as well as being highly moisturising. The shea butter is full of fat soluble vitamin A & E for a soothing, emollient base. The beeswax creates a protective layer on the skin to keep moisture at bay. The chamomile is soothing, anti-infalamtory, anti-bacterial & helps to keep fungal rashes at bay.

But best of all its really quick & easy to make, this is a melt & stir recipe.

bum-balm

Baby Bum Cream a’la Mama Going Natural

  • 1/4 c coconut oil
  • 1/4 c shea butter
  • 1 tablespoon beeswax
  • 2 tablespoons cocoa butter
  • 5 drops chamomile essential oil
  • 2 drops lavender essential oil

Measure out all of your ingredients except the essential oils. Place the ingredients in a glass jar. Put a pot of water on the stove to simmer & place your jar in the pot of water to melt & combine all the ingredients. Once it has all melted, gently stir to combine. Let your cream cool to just above room temperature, add in your essential oils & stir well. Leave to cool in the jar if your going to keep it in the jar or pour it into your chosen containers.

Store in a cool, dark place preferably. You can always split your cream into several small bottles so that you can keep a couple in the fridge so that they don’t spoil as this recipe contains no preservatives.nappy-cream

When using make sure that you don’t double dip as you can contaminate the balm with fungus cells if your baby has a fungal based rash.


Enjoy

Mama-going-natural-signature

DIY Beauty recipes in Healthy Mama Magazine

30 Mar

Visit Healthy Mama Magazine to see our latest DIY beauty recipes each issue. Follow the link to see this months recipe for a soothing, gentle almond cleanser that you can easily make at home.

https://itunes.apple.com/us/app/healthy-mama-magazine/id950266920?mt=8&uo=4&at=10l9J9

Healthy Mama PINK Cover.jpg

healthy mama article jpg

Enjoy

Mama-going-natural-signature

Make your own decadent eye cream

14 Jan

luxurious-eye-cream

My most sincere apologies I have been such a slack blogger of late. I won’t give you my list of excuses – because that’s all they really are, excuses.

But I promise I will be blogging more frequently.

Starting with this (peace offering) eye cream formulation that is heavenly. This eye cream will work just as well as all your fancy store brought ones just without the chemicals & hefty price tag.

I make it in a double batch & use it as a face cream too – just because I can.

It is light, silky & ultra hydrating with Rose hip & jojoba oil & our wrinkle busting, super restorative carrot seed oil. The organic green tea is chock full of antioxidants to start reversing the ageing process & get to work on those wrinkles.

Start using this & watch your wrinkles melt away……….You’re Welcome!!

eye-cream

Natural Wrinkle busting Eye Cream a’la Mama Going Natural

  • 1/8 c organic green tea
  • 12gm Rosehip oil
  • 12gm Jojoba oil
  • 12 drops carrot seed oil
  • 1/4 teaspoon vitamin E
  • 1/2 teaspoon Emulsifying wax
  • scent with your choice of essential oils or leave it plain as it is going around your eyes!

Place your organic tea in a clean, sterile glass bowl or jar & place in a gently simmering pan of water. Measure out the Rosehip & jojoba oil & wax, combine all three items in another sterile glass bowl or jar & place in the simmering pan of water to melt.

When the wax has melted, remove both jars from the simmering water & pour the liquid into your melted oil & wax mix & blend well with a stick blender, whisk or at worst a fork.

Be sure to blend well for a minimum of three minutes to combine your cream, once your cream is well combined add the Vitamin E & carrot seed oil & any essential oils you may want to add – blend well to combine & then let cool.

I preserve mine with .5ml of Leucidal so it keeps for forever, but an un-preserved batch will keep in the fridge for many months & you get the added soothing effect of cool lotion -great for treating puffy eyes.

Enjoy

Mama-going-natural-signature

Make your own Facial Cleansing Wipes

12 May

facial-cleansing-wipes

Now I normally clean my face with our clay cleansing bars or our almond cleanser but we have been doing a bit of travelling lately  – yay!!

So I decided an all purpose facial cleanser that could remove make up, dirt, cleanse & tone my skin all in one quick little step was the ticket, so I could spend more time out exploring the big wide world 🙂

We set to work coming up with recipes to create our own facial wipes, we wanted them to be able to remove make up but not be too greasy & also have the toner element included so that they are a one stop shop. A simple swish, swipe & viola your done.

We decided to go with coconut oil as our cleansing element because I love the natural fragrance & its anti fungal, antibacterial properties which I think are great for cleansing your skin. But if your not partial to coconut oil, sweet almond oil makes a great substitute & maybe a slightly less greasy wipe so if you have oily skin this may be the way to go.

Witch hazel is our toning element, it is lightly astringent & perfect for soothing inflamed skin, great for drying our & healing pimples & is supposed to help with blackheads.

Making these facial wipes is super dooper easy, so I would suggest making a small batch every one to two weeks so that you don’t have any spoilage issues as there is no preservative involved in this recipe.

Facial Cleansing Wipes a’la Mama Going Natural

  • Packet of organic cotton facial pads
  • One sterile empty jar that your cotton pads fit in
  • 1/2 c witch hazel
  • 3 T coconut oil
  • 1 t Vitamin E oil
  • 5 drops of lavender oil (only if you want to)

Take your jar & fill it with the cotton facial pads, I ended up being able to use about 60 pads in my jar.

If its cold where you are (like it is here) melt your coconut oil gently over low heat, as soon as its melted (you don’t want it to get hot) add in your witch hazel, vitamin E & essential oils if you choose. Mix well & pour over your cotton facial pads, gently pushing the pads down so that they all get immersed in the liquid.

Screw on the lid & try to keep your jar in a cool, dark place so that your facial wipes will keep.

Then enjoy swish, swash, swipe make up removal.

Mama-going-natural-signature


Make your own Natural Hair Styling Gel

10 Oct

hair-styling-gelThis recipe is so easy, its almost embarrassing to post. But it works so well that I just have to post it!!

A few ingredients from your pantry is all you will need to make this Super easy Styling Gel. It really makes me wonder why I ever brought styling gel??

All you need is gelatine, peppermint tea bags, a spray bottle & your choice of essential oils, that is it!!!

This styling gel leaves my hair soft, shiny & supple, not gunky or glued together & it washes out easily just with water, if you have gone “no-poo”.

This tames my un-ruly & sometimes fluffy curly hair, effortlessly. I have used a whole host of costly, chemical, synthetic concoctions to try to tame my hair over the years & this simple little Styling Gel is up there with the best of them, but it only costs cents to make 🙂

The only draw back is that it does need to be kept in the fridge or it will go off, even in the fridge it has a limited shelf life of several weeks. To get around this I make small batches often, it only takes minutes to whip up a new batch so its not that much effort!

You can make your Styling Gel with water if you like, but I like making mine with peppermint tea as it is purported to help stimulate the hair follicles &  promote hair growth. I use orange essential oil as it is also great for promoting hair growth. But mainly because I am in love with the combination of peppermint & orange, it just smells so fresh, zesty & clean.

Zesty Fresh Hair Styling Gel a’la Mama Going Natural

  • 1/4 teaspoon unflavoured gelatine
  • 1/2 c hot water
  • 2 peppermint tea bags
  • 4 drops orange essential oil
  • 1 drop peppermint oil

Place peppermint tea bags in the hot water to steep for 5 – 10 minutes, remove the tea bags & add in the gelatine & stir to dissolve (you can do it in a pot on the stove if your peppermint tea is too cool). Once the gelatine has melted place your mix in the fridge & let it set for several hours. Once it is completely cool & set add your essential oils & stir through.  Use a funnel to pour it into your spray bottle. Keep your gel in the fridge, to stop it going off.

This Styling Gel works equally well on dry or wet hair, I prefer to style my hair wet, as a comb & dry curls always results in a very attractive afro.

hair-styling-gel-hair

You can see the patch at the back that got no Styling Gel & is still frizzy!

You can tweak the recipe to suit your hair & preferences by changing your tea base & essential oils:

Chammomile tea is great for blondes & will add natural shine & enhance natural highlights. It can also help to tame coarse hair, helping to smooth the hair follicles

Rosemary tea is great for dark hair & is the best tonic for dry hair, it will keep hair glossy. Its well known for its antioxidant & growth stimulant properties.

Lavender is great for conditioning all hair types.

Horsetail tea is high in minerals & strengthens hair while adding  a healthy shine.

So get into that pantry of yours & start making your own chemical free styling products for cents.

Mama-going-natural-signature

DIY Natural dish washing detergent

26 Sep

I am a Mama trying to Go Natural.

I am by no means a perfect Mama & I fail (a lot) at the whole “going natural” thing.

diy-dish-washing-powder

One area that has been weighing on my mind lately is “the washing of our dishes” you see I am kind of addicted (yes, I said addicted!) to my bright green store brought (very, very un-natural) dish washing liquid.

It bubbles, it froths, it smells so clean, it cuts through grease & leaves my dishes gleaming. But it is made from ingredients that are known endocrine disruptors & possible carcinogens.

And we are eating & drinking it’s residue off our cups, plates & cutlery. Well no more!!

After much research & trialling several different home made detergent variations I have found our new “more natural” way to wash the dishes.

Does it smell as good as my store brought dishwashing liquid – YES. Does it cut through grease the same – NO. Does it froth & bubble the same – Sadly NO.

BUT, although it takes a little more effort to wash the dishes it is a small price to pay for the health of my family.

So my addiction to the lovely bright green detergent has been broken.

Now I know a lot of recipes that are floating around the internet call for washing soda & borax in them & seemingly these products make for nice, clean shiny dishes. But on the side of my packet of electric washing soda it says “wear gloves when using”. Now  I don’t wear gloves when washing our dishes nor when eating off them!. I think that any product that calls for the usage of gloves should not be ingested in any form – that is just my personal opinion. I know that many claim that borax is fine to use, but the Environmental Working Group claim that it is an endocrine disruptor amongst other nasty things, so I just don’t feel 100% comfortable using it. If I am going to be ok with using a hormone disrupting product- I will stick with my bright green dish washing liquid!

So my dish washing powder does not use either borax or washing soda & as a result may not work as good as other recipes – but it is healthier & that is the object of the exercise after all.

Dish Washing Powder a’la Mama Going Natural

  • 1 Plain bar of  Soap (I use sunlight soap here in Australia, I hear it is on a par with Dr Bronners)
  • 2/3 cup Bicarb soda
  • 3 Tablespoons Salt
  • 20 drops Eucalyptus oil
  • 10 drops Lemon oil

I have a thermomix style machine that just eats bars of soap. So I place all the ingredients in my thermomix & blend for 30seconds on power 10 & viola you have yummy smelling dish washing detergent, that is the consistency of laundry powder. Keep it in airtight sealed jar & try not to introduce any moisture to it or you will end up with damp, clumpy soap mush.

This soap powder can be made in any blender or food processor (you just might want to pre-chop your soap bar) or at a pinch you could grate your soap bar & mix in with the other ingredients, I just don’t think it will melt into the water the same.

dish-washing-powder

How to Use

I am lucky to live in a home with a double sink so I fill one sink with hot water & 1 teaspoon of our dishwashing powder – to wash the dishes in & the other with some water with a dash of white vinegar – to rinse my clean dishes in. I find this helps to remove that greasy feel that you get from using natural soap. If I have a burnt pot (who me 😉 ) then I add 1/2 a teaspoon of powder direct to the pot & scour it to get it clean. If there are quite a few dishes to wash sometimes I have to let the washing water out & re-fill the sink, so that there is enough soap power to get them all clean.

How do you wash your dishes, what are your green cleaning recipes, I would love to hear them.

Mama-going-natural-signature

Make your own Aluminum Free Baking Powder

2 Sep

aluminum free baking powder1

It seems like every time I turn around there is another product we need to make ourselves or eliminate from our diet.

With Aluminum being linked to the rise in Alzheimer’s & my memory not being what it used to be – store brought Baking Powder has to go.

Aluminum is added to commercial baking powder to get the baking powder to react slower to heat, it is added under all sorts of names & guises the most popular being “sodium aluminum sulfate” but just because that name doesn’t appear on your packaging doesn’t necessarily mean you are safe.

This recipe for home made Aluminum Free baking powder acts much in the same way as the store brought ones, just without all the nasties & potential memory loss!!

Making your own baking powder is Super Easy & only takes a minute.

Aluminum Free Baking Powder a’la Mama Going Natural

  • 2 Tablespoons Cream of Tartar
  • 1 Tablespoon of Bicarb Soda
  • 1 Tablespoon of Cornstarch or Cornflour

Combine & store in a sealed container as you would your store brought baking powder

aluminum free baking powder2

All baking powder looses its ability to rise over time. To check your baking powder is still raring to go simply boil half a cup of water & add 1/2 t of baking powder to it. If it fizzes like crazy you are good to go, if it’s a little lack lustre it might be time for a new batch.

Mama-going-natural-signature

Easy Home made butter in your blender

30 Aug

I am lazy, a somewhat sad, but ultimately true fact!

The other day while discussing our favourite Organic brands with another Mum, I happened to mention that I like a certain type of store brought butter, to which the other Mum replied that she never buys butter & makes all the butter her family consumes.

A bad bout of Mummy guilt ensued!

butter

I don’t buy some of my butter, I buy ALL of my butter. So off I went to the supermarket in pursuit of pure cream to churn into butter – to dampen my Mummy guilt.

Home I came with my cream, excited to have a go. Only to consult the internet & find that making butter is a multi-step process that requires special butter bats (Whatever they are?) & lots of rinsing & kneading & other fun stuff.

Did I mention I am lazy??

So my cream languished away in the fridge, while I mustered the enthusiasm to get up close & personal with it & knead it into submission (butter).

Then I had an idea surely I could get my blender to do all the work, while I supervised! Thus this butter recipe was created. I find that this butter lasts just as long as butter made with lots of washing & kneading – just without all that time & effort!

Easy Blender Butter a’la Mama Going Natural

  • 600mls Pure Cream – make sure it is just 100% cream, no thickeners etc
  • Salt, I use about a teaspoon –  but you can do it to taste – I like it salty

I made my butter in Bella (my Thermomix knock off).

To start pour in the cream & beat at the highest setting for two to three minutes. The fat (butter solids) separates from the buttermilk & the fat ends up above the blades.

butter-churning

Pour off the buttermilk (saving it for baking, pancakes etc) all the while kneading & pressing the butter solids against the edges of the blender jug to squeeze out as much butter milk as you can.

squeezing-out-buttermilk

Once you have pressed out as much buttermilk as you can. You can add your salt & refrigerate your butter as is  – but it will only last a few days.

Or, you can wash your butter by adding water to cover your butter & a few ice cubes to your blender & blending for 30 seconds – this will wash & knead your butter for you :). You can omit the ice cubes if you live in a cold climate, they are just to keep the butter solid.

washing-butter

Pour off the water, squeezing & kneading your butter with your spatula to remove all liquid, if your water is quite milky you can repeat the process until your water runs clear.

Then add your salt & put it into your container & viola you will have homemade butter and be the envy of all the other mums, without all the effort !!

butter-2

It will be our “Little Secret”

Mama-going-natural-signature

Make your own Coconut Butter – save a bucket load of cash

29 Apr

It seems every sugar-free or grain-free dessert recipe I come across these days wants Coconut Butter, which is great. But at close to $20 a jar at our local Health Food Store, we can’t be throwing that stuff around.

Now what if I told you, you can make your very own Coconut Butter for a fraction of the cost &  it’s super easy.

Would you be interested?

Making your own Coconut Butter is easy, it just takes patience, a bag of shredded coconut & some form of Vitamix, Stick Blender, Food Processor or a Thermomix.

You thought Coconut Butter was some magical part of the coconut, right?………me too.

It’s just poor old coconut flesh beaten into submission until it turns into rich dreamy butter, that tastes pretty similar to unsweetened Coconut Ice, remember that from your Sugar consuming days?

Because not everyone is lucky enough to have a Vitamix or Thermomix sitting on their kitchen bench I have included more in-depth instructions for how to make Coconut Butter with a Food Processor or Stick Blender.

My preferred method is actually the stick blender! – I love blending that coconut into butter – what does that say about me? Eeeek……..

coconut-butter

Stick Blender method for making Coconut Butter a’la Mama Going Natural

You will need

  • Bag of shredded Coconut
  • 1 t coconut oil (maybe)

Pour about a quarter of your shredded coconut (2 cups) into your blending container & start blending it.I find an up/down movement to be helpful once it starts to look like the image below add another two cupfuls & repeat the process until you have the entire bag in your blending container.

making-coconut-butter-2

This will take 10 minutes or so, so be patient. It will be worth it in the end, I promise.

Keep blending until the coconut starts to warm up & become moist. If this isn’t happening for you then add the coconut oil to help it along. Keep blending until your coconut has turned into a warm paste. Taste to make sure you are happy with the consistency, if it’s too grainy keep blending but if it is buttery & still a little powdery then you have successfully made Coconut Butter. Congratulations!

Now you can jar your butter & make some serious desserts!!

Food Processor method for making Coconut Butter a’la Mama Going Natural

You will need

  • Bag of shredded Coconut
  • 1 t coconut oil (maybe)

Ok so this method is a little more time consuming as you have to scrape down the sides of your food processor more often to keep the coconut blending so that it can turn into butter, but it is still completely do-able. I actually have found that sitting one side of the food processor on a stack of books helps to keep it on a lean & keep the coconut in the blades. To make coconut butter this way will take a little longer, but persevere. You will get there in the end.

Vitamix method for making Coconut Butter a’la Mama Going Natural

You will need

  • Bag of shredded Coconut
  • 1 t coconut oil (maybe)

Simply pour the entire bag of coconut into the blender and blend for five minutes at 6. It may need a few additional pulses on high to get a smooth consistency. This is definitely one of the easiest ways to make coconut butter 🙂

Thermomix method for making Coconut Butter a’la Mama Going Natural

You will need

  • Bag of shredded Coconut

Pour your bag of coconut into your Thermomix & set to grind for 3 minutes at 37degrees on speed 8. For a very smooth butter you can turn the Thermomix to speed 9 for an extra 30 seconds.

You may need to stop the Thermomix & remove the lid to push down the coconut off the sides a few times during the three minutes.

Viola you will have smooth, creamy warm butter ready to jar & use at your leisure

Now what are you going to do with all that yummy Coconut Butter?

Chocolate coconut fudge

How about Chocolate Fudge 

signature-2

Healthy Sugar-Free tomato sauce – I kid you not!

13 Apr

Tomato Sauce is not a condiment, it is one of life necessities!

Just ask my “little miss” who dips her chips in Tomato Sauce & then licks them clean, only to re-dip the chip. She would gladly sit down to a big bowl of Tomato sauce for dinner, if only Mama would let her.

For this reason developing a healthy tomato sauce recipe was an “Urgent Priority” when we decided to kick all the chemicals, additives & nasties in our diet.

Making a yummy tasting tomato sauce without SUGAR is a tall order. But this sauce tastes so good – you won’t believe its healthy & you will never go back to that icky red stuff that comes from a bottle!

The only problem with this scrummy sauce is that without all the colourings that come in supermarket sauces, it’s a little meek in colour. But what it lacks in colour, it makes up for in flavour!

“Little Miss” approves & has given the sauce her two thumbs up (kids equivalent to a 3 hat Restaurant rating). And she is still double dipping those chips!!

Let me introduce you to tangy, tasty, heaven in a bottle.

cut-out-sauce-large

Healthy Sugar-Free Tomato Sauce a’la Mama Going Natural

You will need:

  • 300gm Roma Tomatoes
  • 1 pear
  • 1 plum
  • 1/2 a medium apple
  • 1/2 an onion diced
  • 1 garlic clove
  • 1/8 c dates (aprox 8 dates)
  • 1/4 c apple cider vinegar
  • 1 T Tamari sauce (or Organic soy sauce)
  • 1/8 t ground cloves
  • 1/8 t ground nutmeg
  • 1 t smokey paprika
  • 1 t salt – to taste
  • 1/2 t pepper – to taste
  • 1 t olive oil

Brown onions & garlic in a little olive oil with a pinch of salt & pepper in a saucepan until they are caramelised.

Roughly chop the tomatoes, pear, apple & plum and add them to the pot to saute. After 5 – 10 minutes of cooking add the vinegar along with the rest of the ingredients & cook until the fruit & tomatoes begin to break down & are cooked.

Take the saucepan off the heat & blend your sauce in either a food processor or with a stick blender. Once smooth return your sauce to the stove & cook for a further 30 minutes over a low heat, stirring occasionally.

Taste your sauce & adjust seasoning to suit your preference, I make mine for “Little Miss” so its a little on the bland side. Feel free to add some chilli or more spices to give your sauce that added punch. If it tastes a little vinegary at this stage don’t worry as it mellows once its cool.

Bottle your delicious, healthy sauce & keep it in the fridge and slather that baby on everything!!

This recipe makes a small bottle of sauce. We prefer to make small batches often, to ensure we don’t have spoiled sauce. But if you prefer a large batch, double or triple the recipe & enjoy sauce to your hearts content.

This sauce has been in our refrigerator for 3 weeks now & is still going strong but being a natural, preservative free product it won’t last forever – not that it has any show of that around here!

Mama-going-natural-signature